
Indian SandStone is one of the famous stone paving materials, and it’s pretty easy to see why. It offers sublime looks in classic and modern outdoors due to its primitive finish, earthy tones, and versatility.
However, like all-natural stone, it’s not resistant to heavy footfall, showers, and winter frosts, which means regular maintenance is the key to keep it good as new.
Indian Sandstone is prone to fading and decay unless proper maintenance measures are not taken regularly. The harshness of the degradation depends on time, use, the type of vegetation nearby, and the proximity of the stone to the water base.
Thankfully, Indian Sandstone can be cleaned straightforwardly and requires little effort. A simple wash with soapy liquid removes everyday dust, while a diluted bleach can tackle tough stains, moss, and algae.
Let’s go through the seven simple steps to clean Indian Sandstone.
What you’ll need:
- Non-acidic soap or bleach
- Special iron-free fungicide for lichen removal
- Bucket and water
- Stiff brush or broom for scrubbing
- Watering can or hose
- A pressure washer
- A bit of elbow grease
- IDENTIFY THE ISSUE

The things required for cleaning Indian Sandstone depend on what’s causing the discoloration and the seriousness of the spread, so it is vital to identify what’s wrong before creating a course of action.
If your Sandstone looks dirty, it’s probably due to everyday use, and it’s easily rectified. More severe issues include green blemishes and grimy spots that grow with usage and time.
- Algae usually cause green fuzz over the whole slab.
- Green borders are formed due to moss growing in the dust between the paving slabs.
- Patches that evolve with time are caused by lichens.
- CHOOSE THE SOLUTION
Before we apply the solution, let’s discuss what to avoid.
To conserve your Sandstone, avoid using acid-based cleaning products or solutions that contain iron. They’ll only lead to rust and more discomfort. Along with that, harsh chemicals promising to remove fungus could discolor the Sandstone for life.
For cleaning everyday grime, the most straightforward and safest remedy is good old soap water (washing-up liquid is the way out), and to tackle more stubborn issues (algae, moss, and lichens), use concentrated bleach.
If it gets difficult to get rid of the lichens using diluted bleach, you might want to go for iron-free specific fungicides.
For cleaning with soap water, use enough soap for the mixture to make it frothy, and use an equal amount of water to concentrate the bleach solution.
- POUR THE MIXTURE
After creating the solution, sweep the affected area and pour the mixture onto your slabs. You might want to remove the nearby furniture to get into contact with the bleach.
Please leave it to rest for around 30 minutes (longer for extreme build-ups) to give the chemicals enough time to loosen surface debris.
- TIME TO STRETCH YOUR MUSCLES
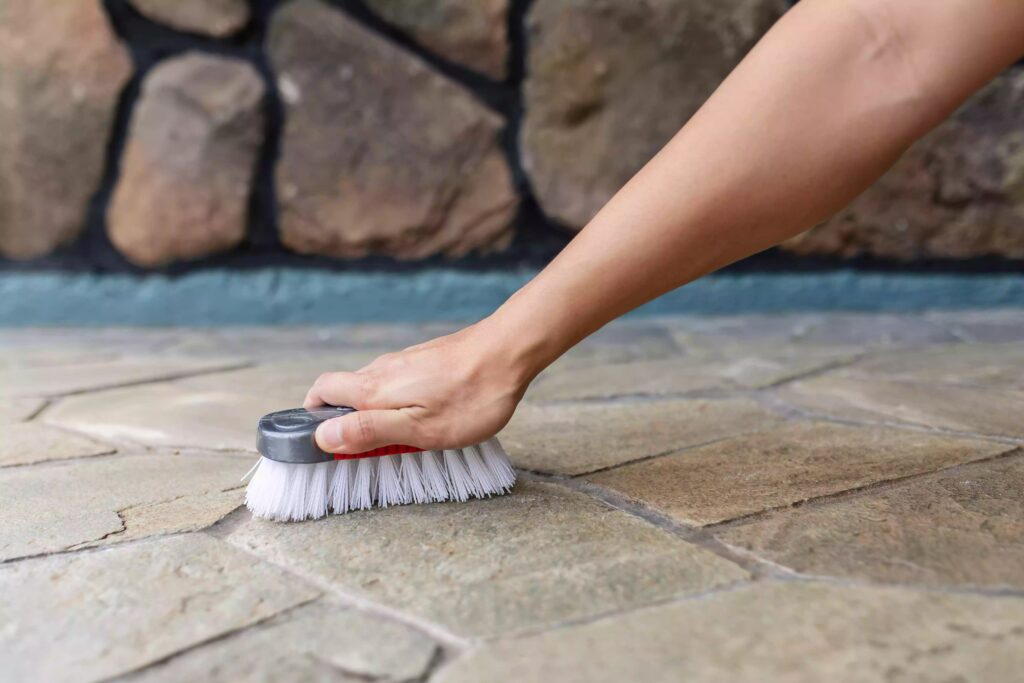
After you’ve drenched the stone with the said solution, it’s time to get to the ground work and stretch some bones.
Grab a firm broom and scrub the stone, particularly on the corners, gaps, and borders. To get rid of Lichen, it’s best to use a stiff wire brush and spend a considerable time going over the impacted areas.
A word of caution – take good note of the amount of pressure you apply as ontrusive brushing could damage the slab.
Do wait for 15-20 minutes if you have applied bleach on the Sandstone.
- RINSE ALL THE WAY
Rinse away the loosened dirt with clean water, using a bucket, watering can, or hose (low-pressure).
In most cases, you are good – your work is complete. However, for more stubborn issues, you may have to repeat the above steps two to three times over several weeks.
- USING A POWER WASHER
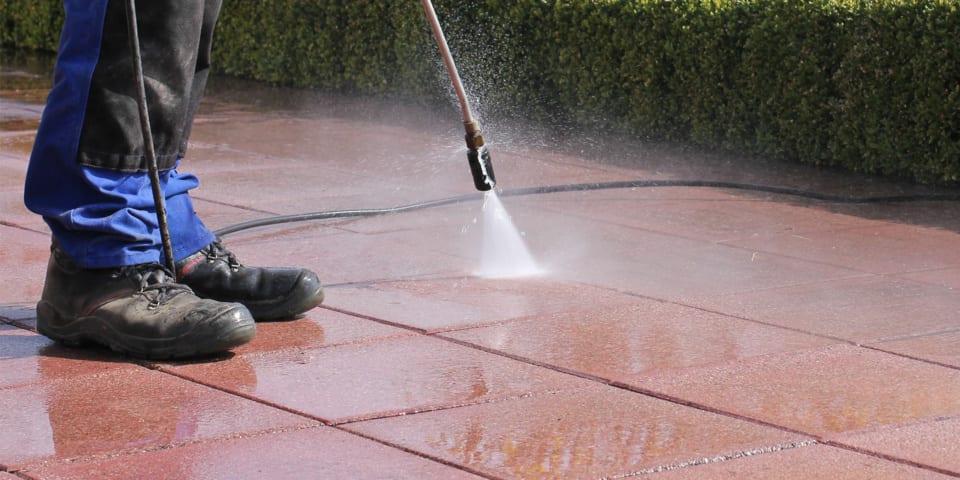
Power or pressure wash Indian Sandstone is an excellent alternative for cleaning and especially useful if you have vast areas to clean. However, you must find the correct pressure setting because Sandstone is relatively soft, and a powerful stream could erode some of the stone surfaces and the grime.
To avoid any damage, select a low power-setting and wash diagonally across the slabs. You might need to repeat the process numerous times to ensure the area is thoroughly clean.
- TAKE PRECAUTIONARY ACTION
Prevention is better than cure! So adhere to the below listed measures to prevent frequent build ups.
- Do regular brushing of your Sandstone to disturb weeds, dirt, and microorganisms before they take hold.
- Invest in a quality sealant. When properly applied, adhesive improves your paving’s longevity by preserving the jointing and eradicating the damp conditions which breed moss, algae, and fungi.
- Remove nearby water sources.
- Go through the above-listed steps every 2-3 months and you will never have to worry about any major maintenance work.
The Beautiful look is back!
You made it!. Your Sandstone is as good as new.
After your paving area is dry, the last thing to do is to reintroduce plants, garden furniture, and people, because it’s time to show off the fruits of your labor.
Recent Comments